My Cart


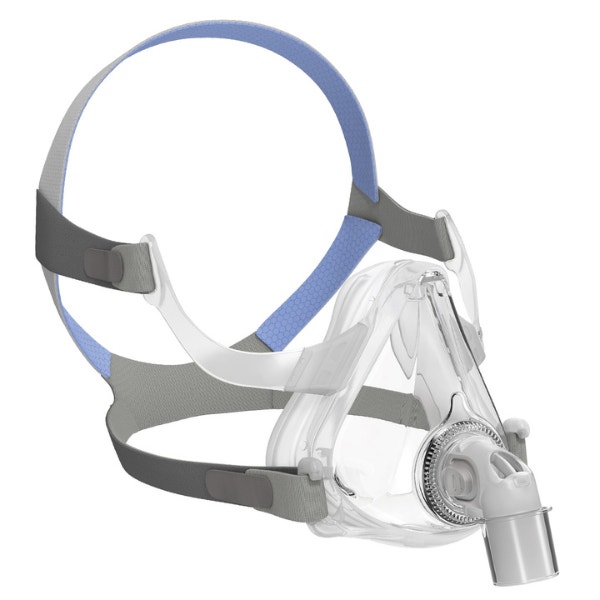
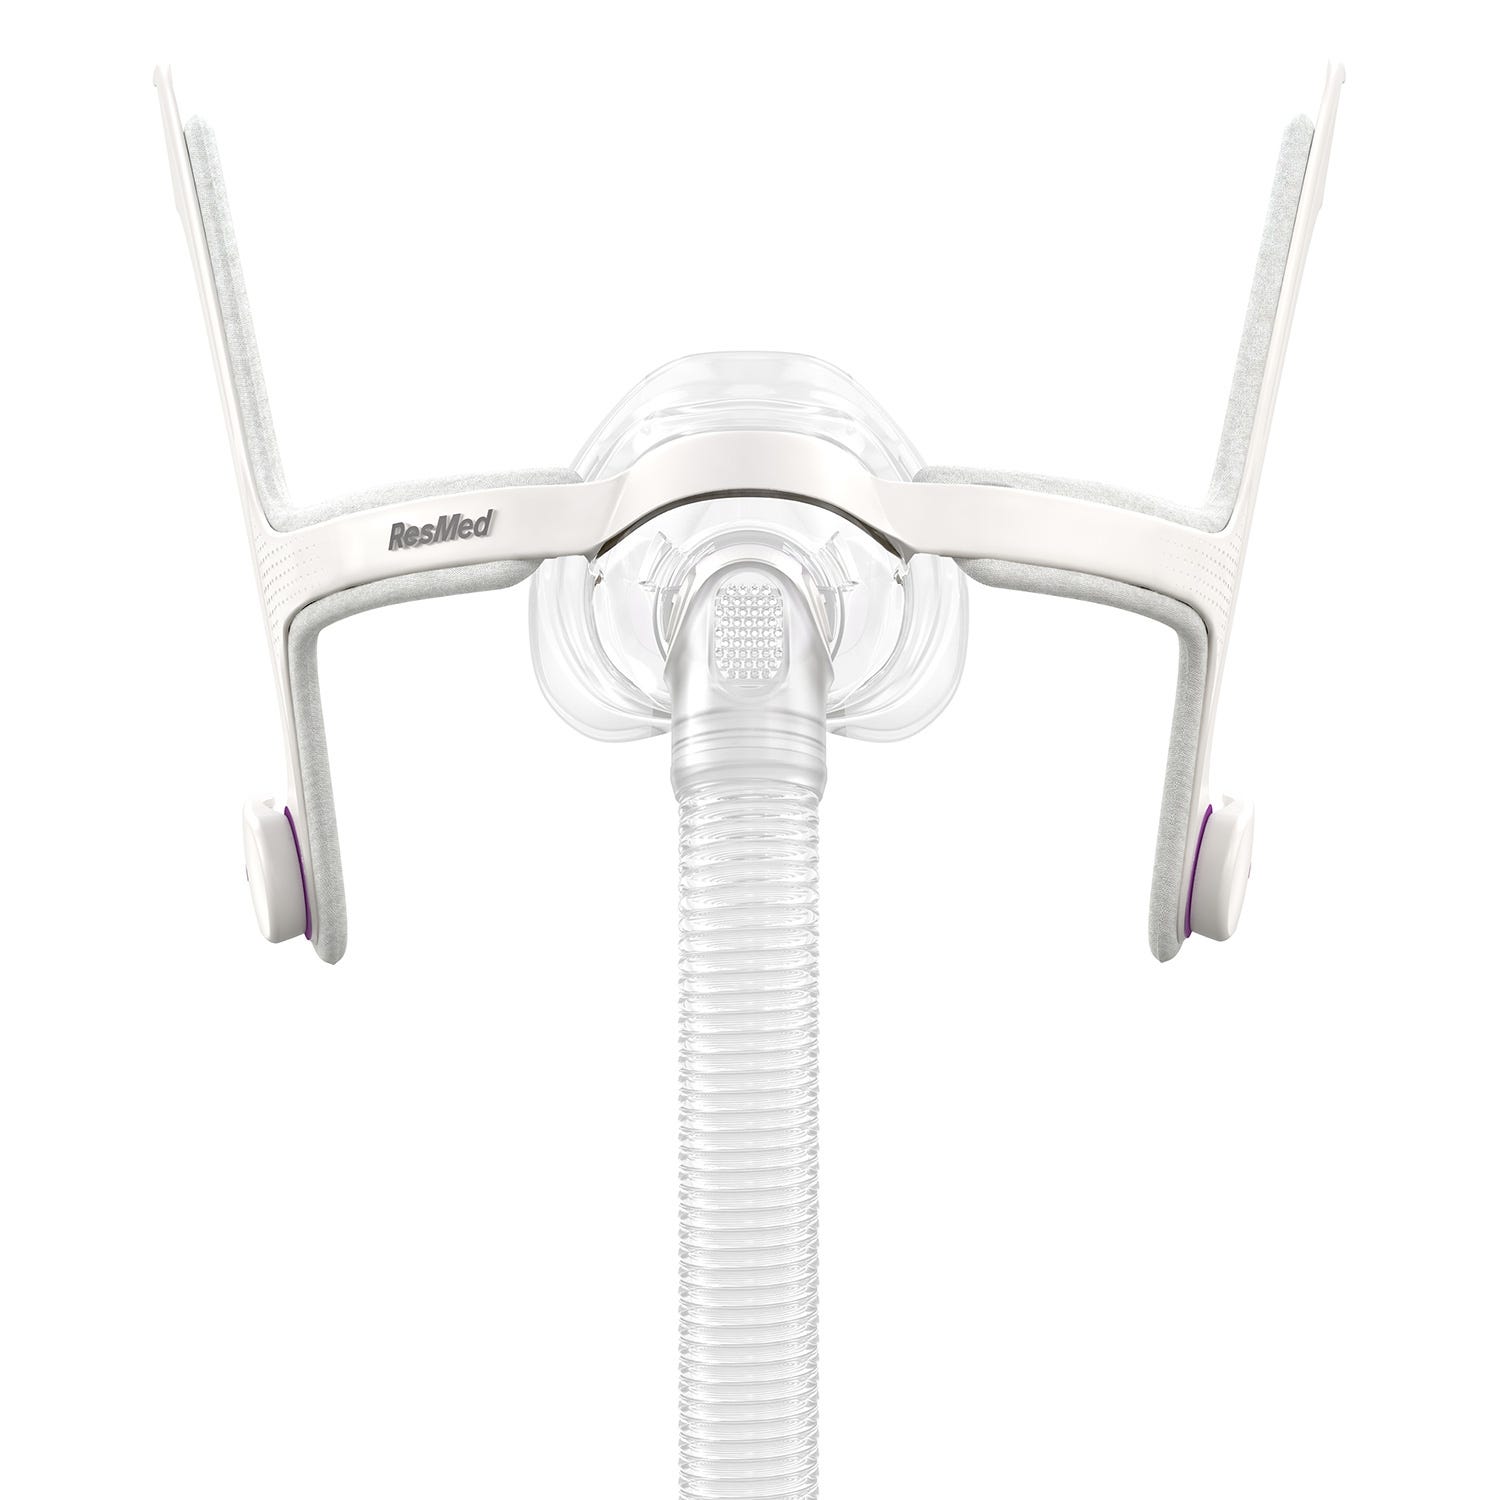
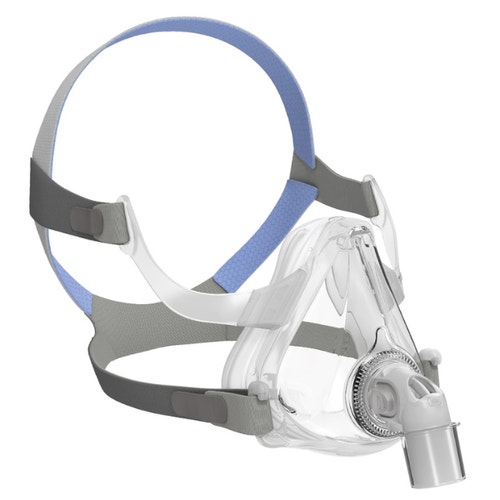
ResMed AirFit™ F10 Full Face CPAP Mask


$124.00
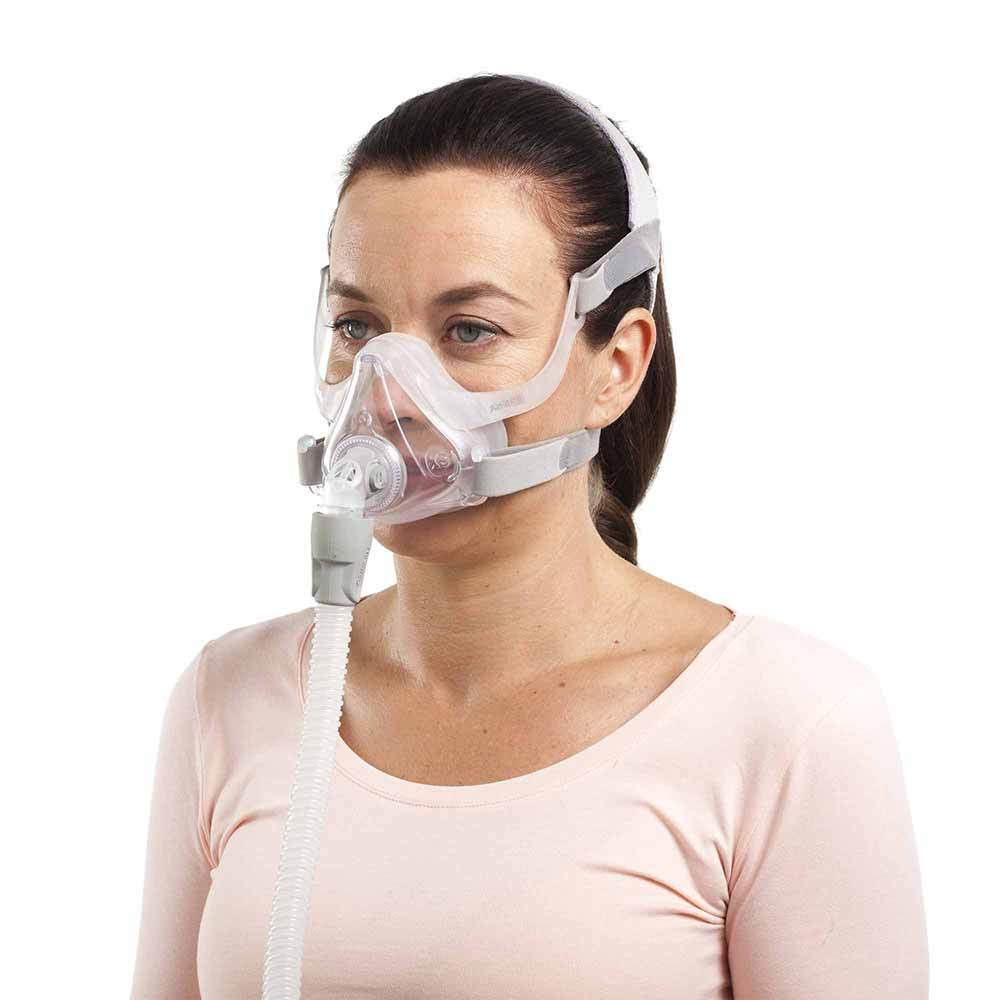
The comfortable but compact AirFit™ F10 full face CPAP mask offers a minimal facial contact so you can enjoy a clear line of sight and less skin abrasion and irritation during your sleep therapy.
ResMed AirFit™ F10 Full Face CPAP Mask Overview
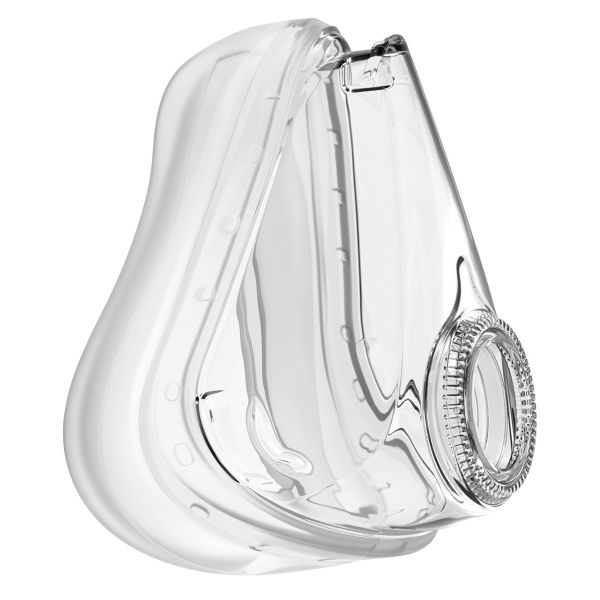
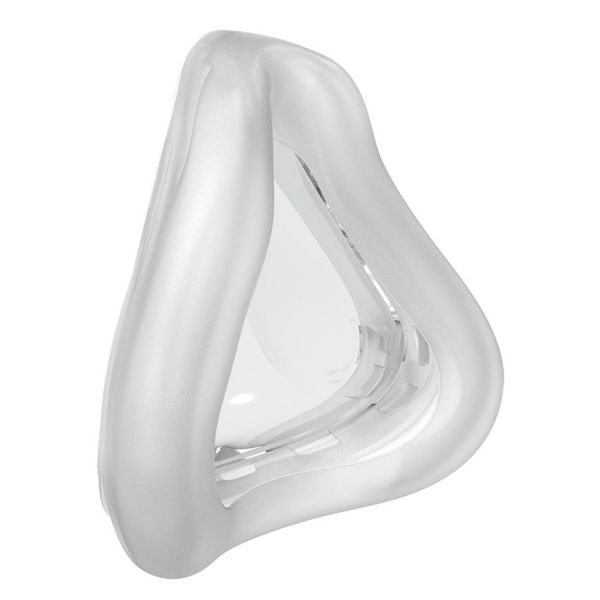
This assembly kit includes a replacement Resmed AirFit™ F10 full-face CPAP mask and cushion. Headgear is not included. The AirFit™ F10 mask cushion provides a lightweight, comfortable fit and a secure seal for full nose and mouth coverage. Unlike traditional full face masks, there’s no need for a forehead support, which means fewer facial marks. The F10 cushion is ideal for CPAP users who breathe through their mouth or want the security that a full face mask provides, with the compact design similar to a nasal mask or nasal pillow mask.
Minimal contact with the face means that users can enjoy a full range of motion and a clear line of sight while settling into sleep apnea therapy for the night. Only four components are included in this design, making it simple to assemble after cleaning. Simply snap the cushion onto the mask frame.
The silicone SpringAir™ cushion is designed to minimize pressure on the face while maintaining a reliable seal and snug but soft mask fit. A dual wall design features a soft inner wall that inflates with air pressure, ensuring maximum comfort during the night. The AirFit™ also features circular diffused venting at the elbow that efficiently and quietly directs air away from the user and bed partner. The quick-release elbow is easily snapped on and off for cleaning or if the user needs to disconnect from the BiPAP or CPAP machine in the middle of the night.
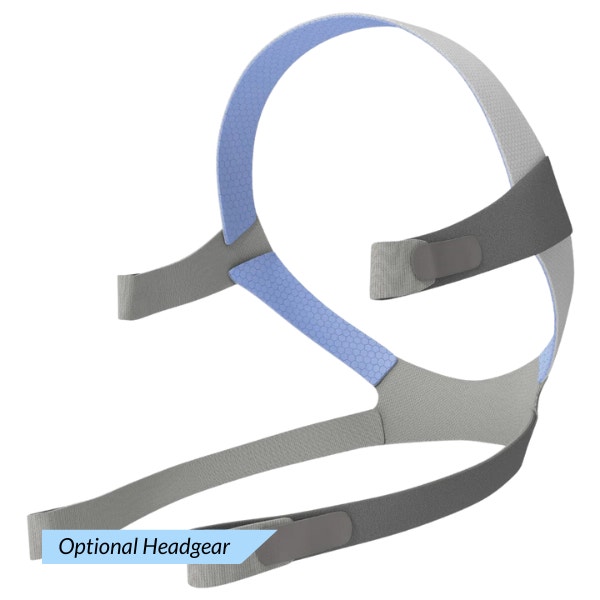
This assembly kit is compatible with the AirFit™ F10 headgear and AirFit™ F10 headgear for her, or you can purchase the full AirFit™ F10 CPAP mask assembly kit with headgear, all without a prescription.
Please note: headgear is not included in your order unless selected above.
-
Easy to use and maintain with just four components
-
Dual-wall SpringAir cushion minimizes pressure points
-
No forehead contact allows users to easily watch TV or read
-
Quick-release elbow with circular diffused venting
-
1 - AirFit™ F10 Mask Frame and Cushion (of selected size option)
-
1 - Elbow
Please note: Headgear does not automatically come with the order. If you'd like your purchase to include headgear, please select your headgear option above. If you select a headgear option, the following will be included:
-
1 - AirFit™ F10 Headgear
Breathing Style:
-
Mouth Breathers
Sleeping Style:
-
Back Sleepers
-
Side Sleepers
Additional Considerations:
-
High Pressure Settings
-
Chronic Allergies or Nasal Congestion
Assembling Your Mask:
Refer to the assembly diagrams in these instructions.
- Press the top of the frame onto the rest of the mask, ensuring it clicks into place.
- Press the bottom corners of the frame onto the rest of the mask, ensuring they click into place.
- To fit the optional soft sleeves, pull them over the upper arms of the frame.
- Attach the top headgear straps to the frame by looping through each of the upper headgear hooks. Ensure that the ResMed logo on the headgear is facing outward and right side up.
- Attach the elbow to the air tubing. Attach the elbow and air tubing to the mask by pressing the side buttons and pushing the elbow into the mask. Pull on the elbow to check that it sits securely in the mask.
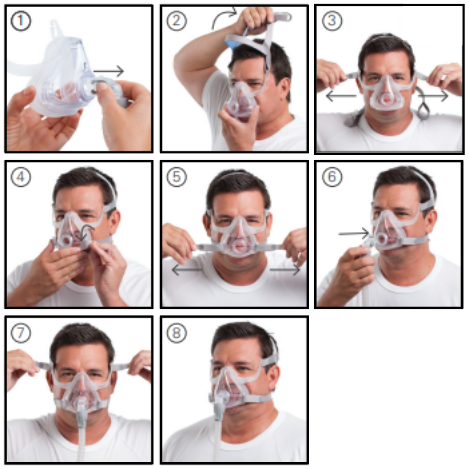
Fitting Your Mask:
Refer to the fitting diagrams in these instructions.
- Remove the elbow from the mask by pressing the side buttons and pulling the elbow away.
- With both lower headgear straps released, hold the mask against your face and pull the headgear over your head. Ensure that the label on the back of the headgear faces outwards when the headgear is put on.
- Undo the fastening tabs on the upper headgear straps. Pull the straps evenly until the mask is stable and positioned as shown in the illustrations. Reattach the fastening tabs.
- Bring the lower straps below your ears and loop the headgear into the lower hooks on the frame.
- Undo the fastening tabs on the lower headgear straps. Pull the straps evenly until the mask sits firmly on the chin and reattach the fastening tabs.
- Connect the air tubing from your device to the elbow. Attach the elbow to the mask by pressing the side buttons and pushing the elbow into the mask. Turn on your device so that it is blowing air.
- Undo the fastening tabs on the upper headgear straps. Readjust the straps evenly only enough that a seal is achieved and reattach the fastening tabs. Overtightening may cause leaks.
- Your mask and headgear should be positioned as shown.
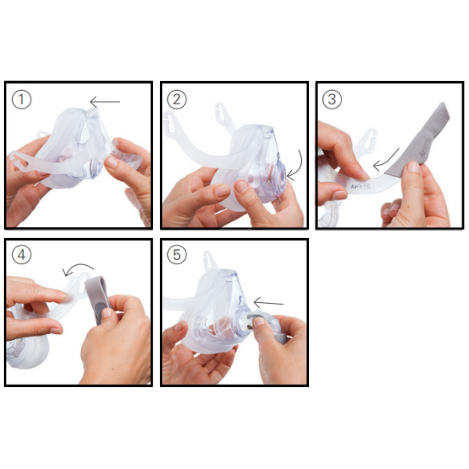
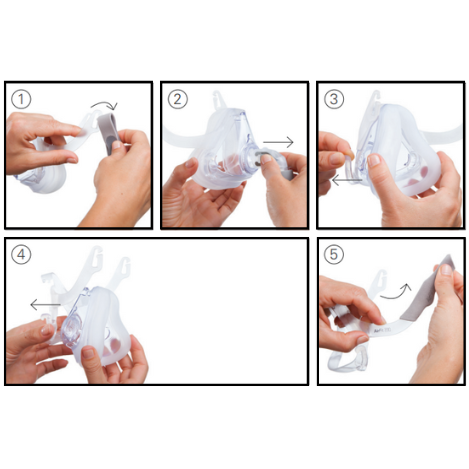
Disassembling Your Mask:
Refer to the disassembly diagrams in these instructions.
- Unhook the upper headgear straps from the frame. There is no need to undo the fastening tabs.
- Remove the elbow from the mask by pressing the side buttons and pulling the elbow away. Remove the elbow from the air tubing.
- While holding the bottom of the hook, pull the corner of the frame slightly away from the side of the mask.
- Remove the frame from the rest of the mask.
- If the soft sleeves are fitted, remove them by pulling them off of the frame.
| Operating Therapy Pressure Range |
| 3 to 40 cm H²O |
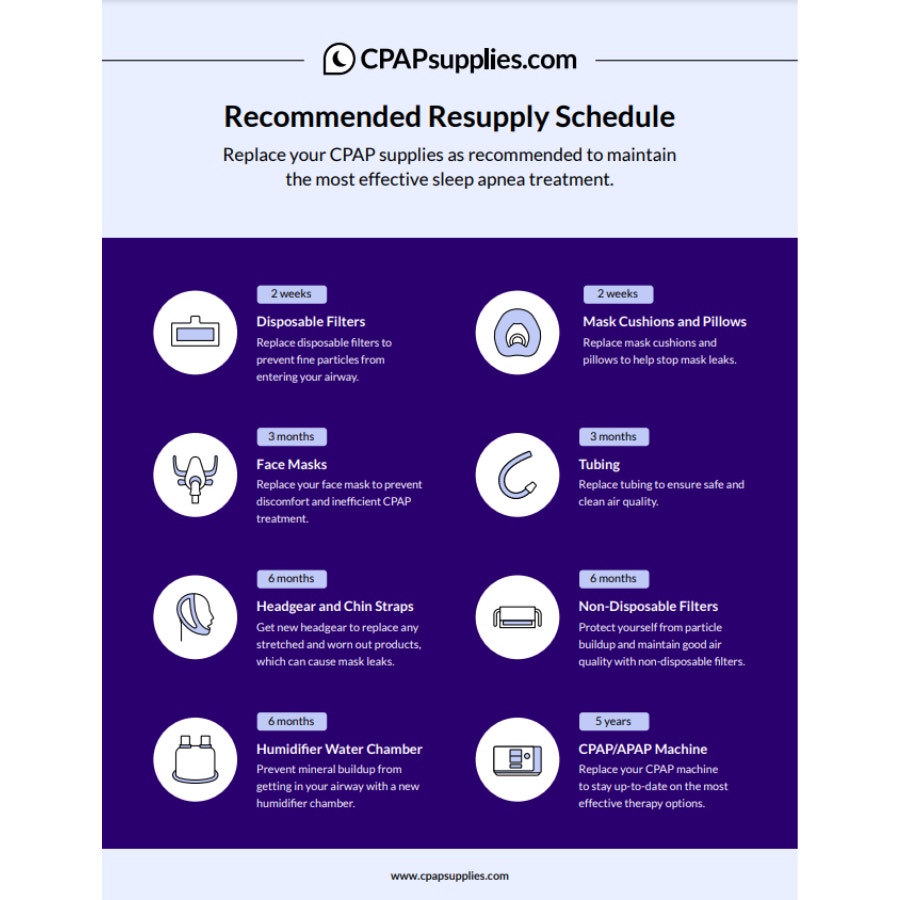
CPAPsupplies.com: CPAP Supplies Replacement Schedule

AirFit™ F10: Fitting Guide
AirFit™ F10: Cleaning and Assembly Guide
- CPAP Mask Frame Replacement Frequency: Resupply Every 3 Months
- CPAP Mask Cushions/Pillows Replacement Frequency: Resupply Every 2 Weeks
- CPAP Mask Headgear Replacement Frequency: Resupply Every 6 Months
CPAPsupplies.com: CPAP Supplies Replacement Schedule


| SKU | pb_AFit-F10-FFM |
|---|---|
| Model | pb_AFit-F10-FFM |
| UPC | 702754066799 |
| Prescription Required | No |
| Manufacturer's Warranty | 90-day limited manufacturer's warranty |
| FSA/HSA Eligible | Yes |
| Dimensions | Extra Small: 4 5/7" (H) x 5 9/16" (W) x 5 11/16" (D); Small: 4 11/16" (H) x 5 5/8" (W) x 5 9/16" (D); Medium: 5 3/8" (H) x 5 3/4" (W) x 5 5/8" (D) |
| Included | 63160, 63161, 63162, 63163, 63164, 63165, 63166 |
Compatible Products
Check items to add to the cart or


1 Item Added to Cart


