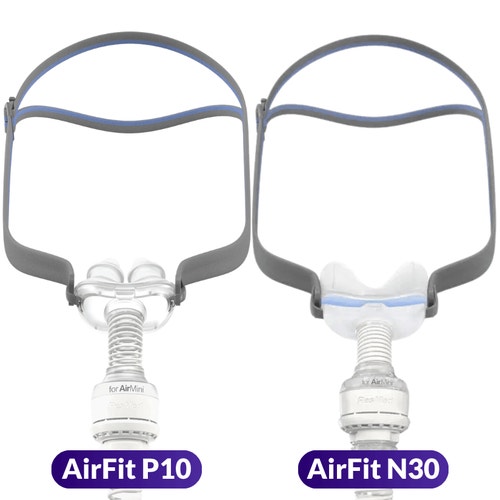


Resmed AirMini™ Starter Pack (with P10 or N30 CPAP Mask)


$165.00
Starter Pack for AirMini™ Setup Pack options:
-
Resmed AirFit™ N30 Setup Pack (Mask Included) - Model # 38878
-
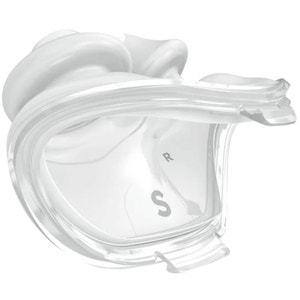
Resmed AirFit™ P10 Setup Pack (Mask Included) - Model # 38824


Resmed AirMini™ Starter Pack (with P10 or N30 CPAP Mask) Overview
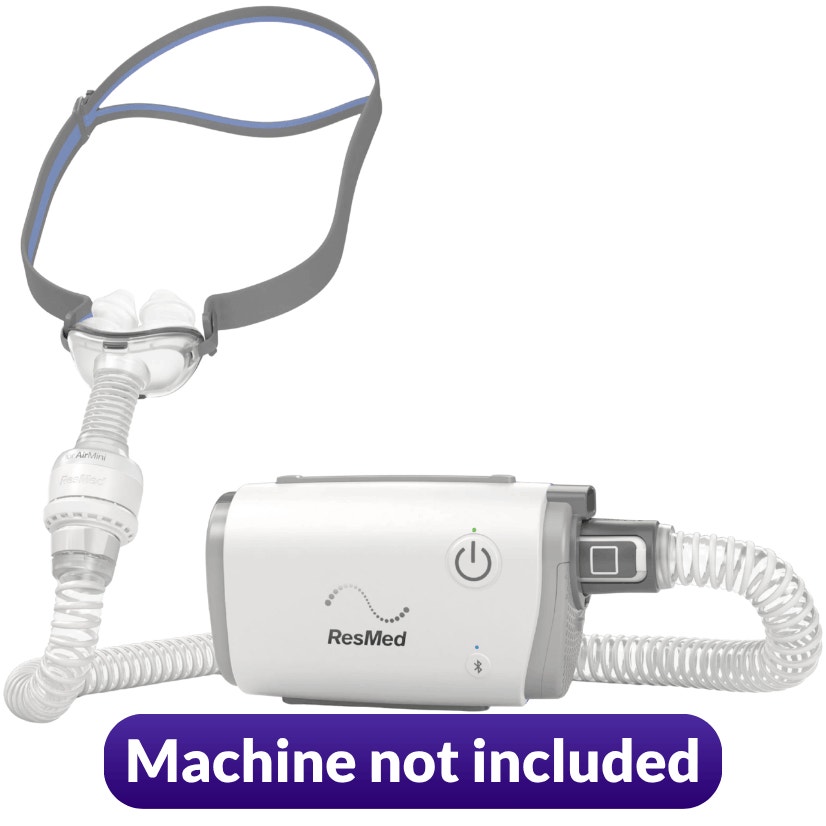
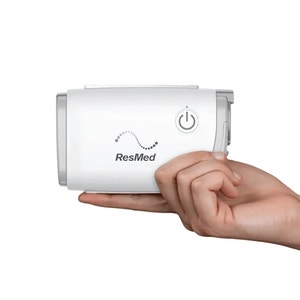
At just .66 pounds the Resmed AirMini™ is the world's smallest Auto-CPAP making it perfect for travel. Providing many of the same features and therapy modes you get out of the Resmed AirSense™ 10 bedside devices (CPAP, AutoSet and AutoSet for Her) including Expiratory Pressure Relief (EPR), SmartStart, and AutoRamp.
This bundle allows you to purchase an all-in-one package of essentials for pairing the AirFit™ N30 or the AirFit™ P10 Resmed CPAP masks with their AirMini™ Auto-CPAP machine.
Please note: the Resmed AirMini™ AutoSet Travel CPAP Machine is NOT included.
Discover more about the Resmed AirMini™ Travel CPAP Machine with our helpful blog: The Ultimate Resmed AirMini User Guide.
The AirMini™ setup packs feature AirMini™ compatible masks, which are required to use the AirMini™ device.
Please note: the AirMini™ Setup Packs do NOT include a battery.

The AirMini™ N30 Setup Pack:
- 1 — N30 Mask Frame
- 3 — Silicone Nasal Cradle Cushions (1 - Small, 1 - Medium, 1 - Small/Wide)
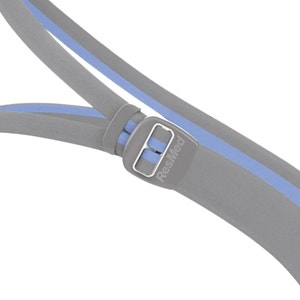
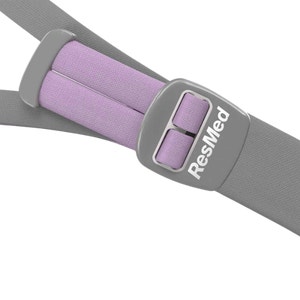
- 1 — QuickFit Elastic Headgear
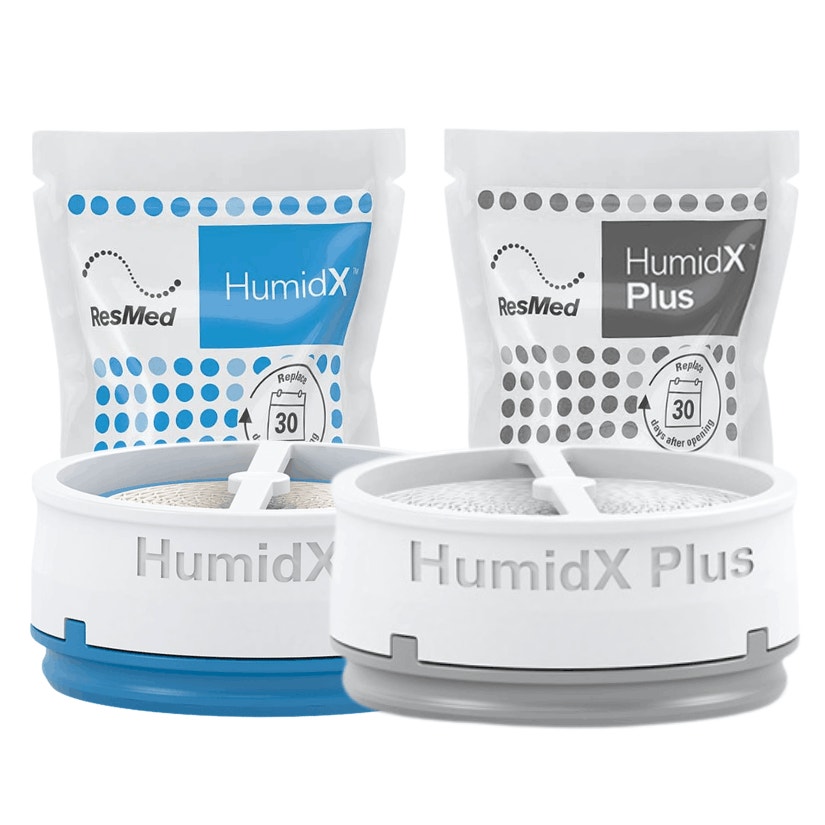
- 1 — HumidX Cartridge
- 1 — HumidX Plus Cartridge
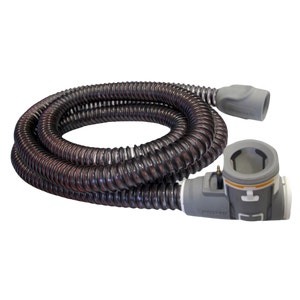
- 1 — AirMini™ Tube
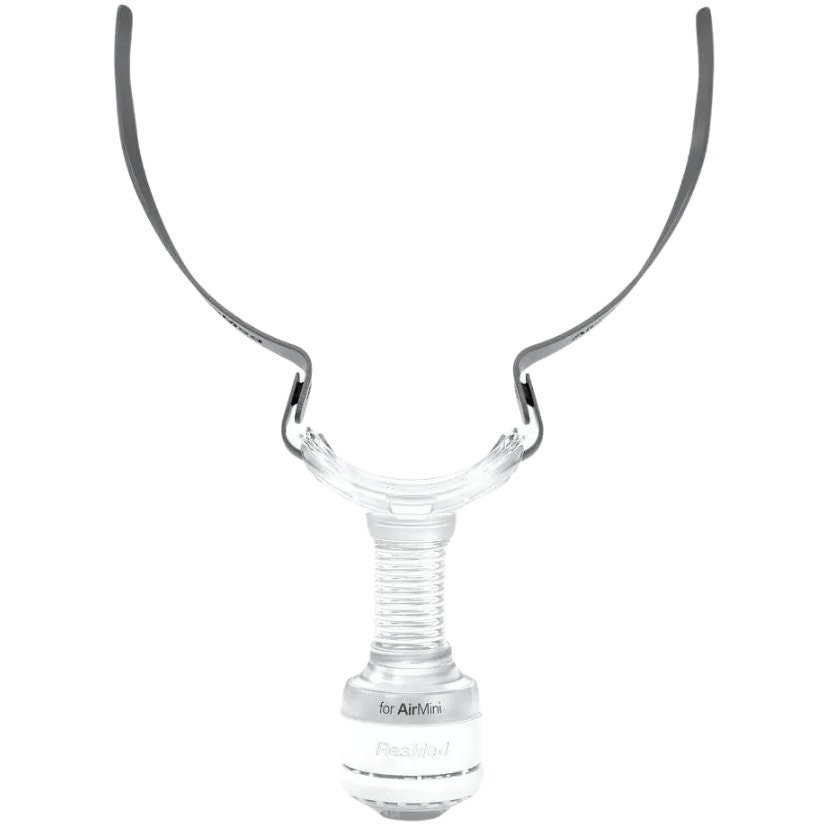
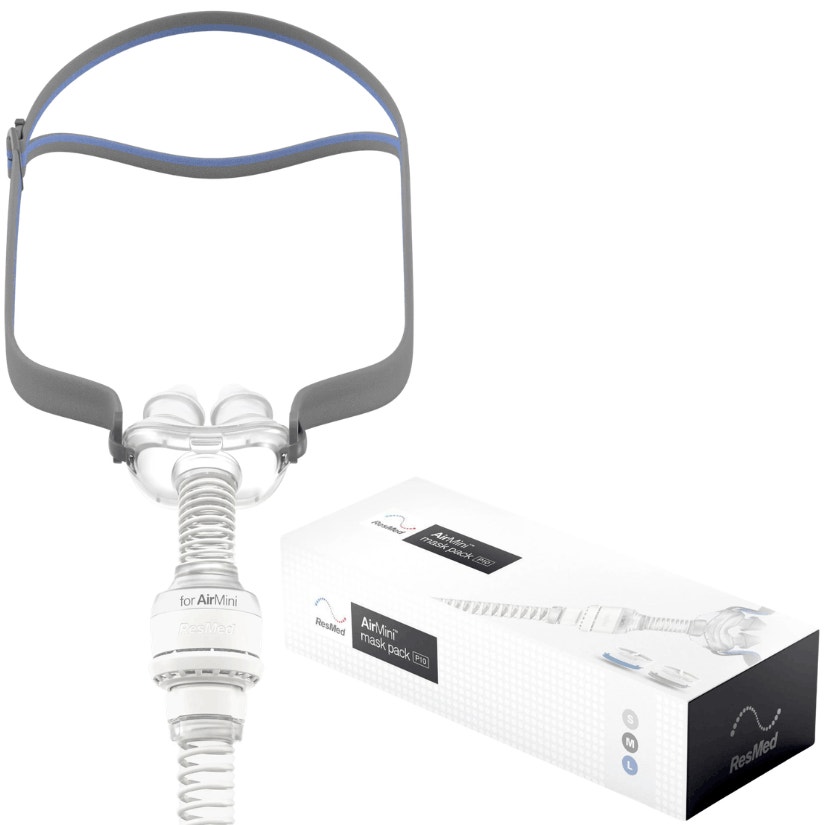
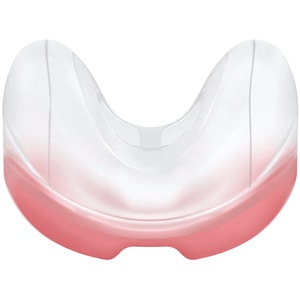
The AirMini™ P10 Setup Pack:
- 1 — P10 Mask Frame
- 3 — Nasal Pillow Cushions (1 - Small, 1 - Medium, 1 - Large)
- 1 — QuickFit Elastic Headgear
- 1 — HumidX Cartridge
- 1 — HumidX Plus Cartridge
- 1 — AirMini™ Tube
Nasal CPAP Masks:
Breathing Style:
-
Nasal Breathers
- Mouth Breathers (when paired with a CPAP mask chinstrap)
Sleeping Style:
-
Back Sleepers
-
Side Sleepers
-
Active Sleepers
Additional Considerations:
-
High Pressure Settings
- Glasses Wearers
- Claustrophobia
- Facial Hair
-
Full Field of View for Reading or Watching TV Before Bed
-
Tossing and Turning During Sleep
Nasal Pillow CPAP Masks:
Breathing Style:
-
Nasal Breathers
- Mouth Breathers (when paired with a CPAP mask chinstrap)
Sleeping Style:
-
Back Sleepers
-
Side Sleepers
-
Active Sleepers
-
Stomach Sleepers
Additional Considerations:
-
Low to Mid Pressure Settings
-
Minimal Contact
-
Glasses Wearers
-
Claustrophobia
-
Facial Hair
-
Full Field of Vision for Readers or TV Watchers
- Tossing and Turning During Sleep
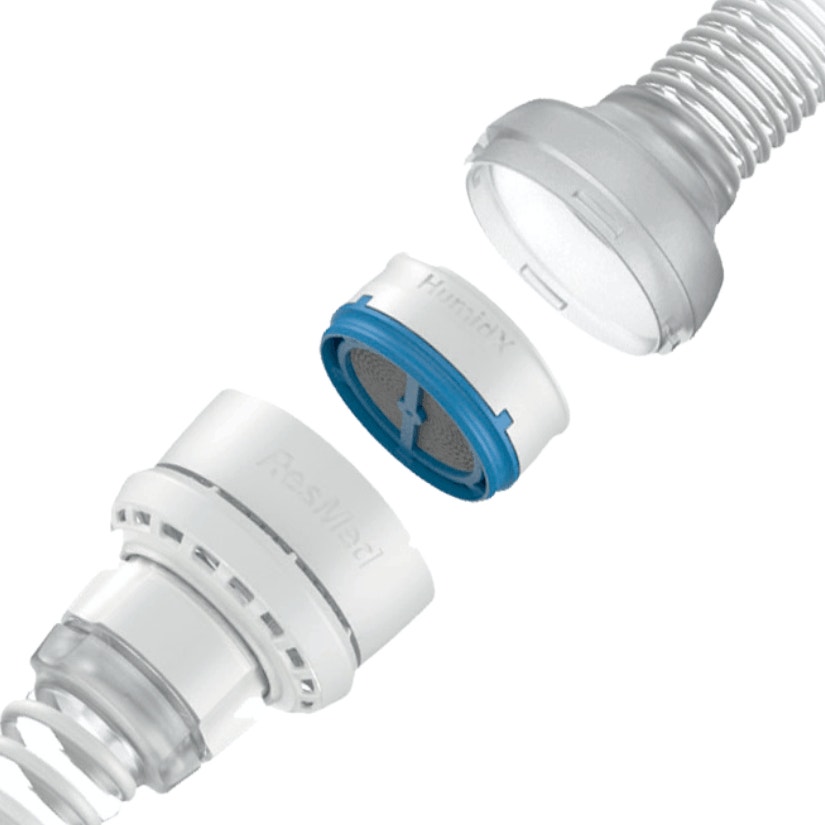
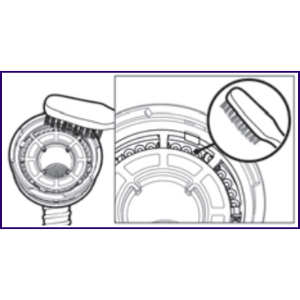
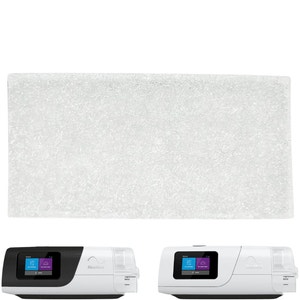
HumidX: Cleaning the vent module
-
Clean and check the vent module daily.
-
Wash in warm water using a mild liquid detergent.
-
Clean with a soft bristle brush paying particular attention to the vent holes.
-
Rinse well under running water. Shake to remove excess water and allow to air dry out of direct sunlight.
-
Check that there is no dirt or dust in the vent holes.
Note: Do not wash in a dishwasher or washing machine.
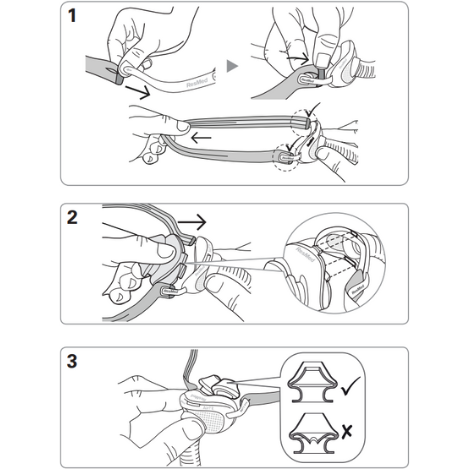
AirFit™ N30:
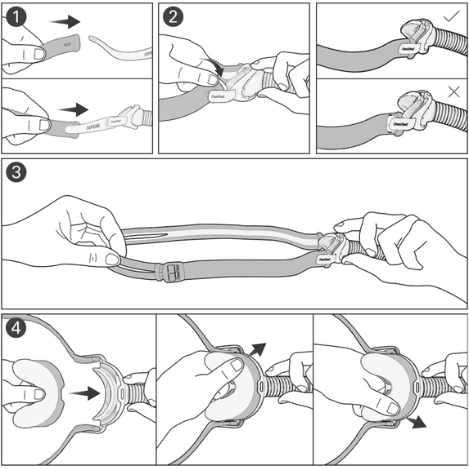
Assembling Your Mask:
Refer to the assembly diagrams in these instructions.
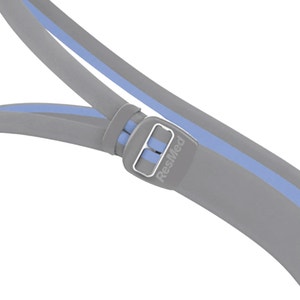
- With the gray side of the headgear facing out, insert each end of the headgear band over the stabilizers through the buttonholes.
- Secure the headgear by pulling the buttonholes over the ends of the stabilizers.
- Holding the mask frame, stretch the headgear lightly to ensure it is securely attached. Ensure that the headgear band is not twisted.
- Align the notch in the cushion to the tab on the mask frame. Firmly push one side of the cushion onto the frame, then repeat on the other side. Push down all the edges of the cushion onto the frame to ensure that the edges are completely flat.
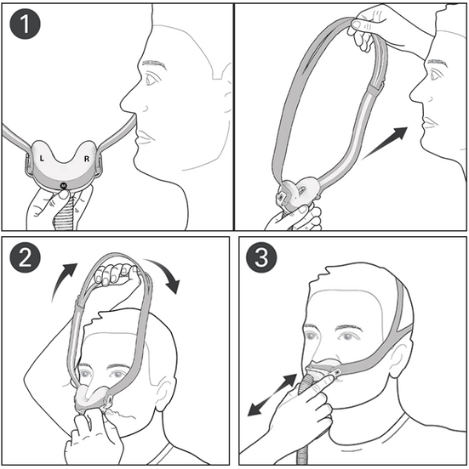
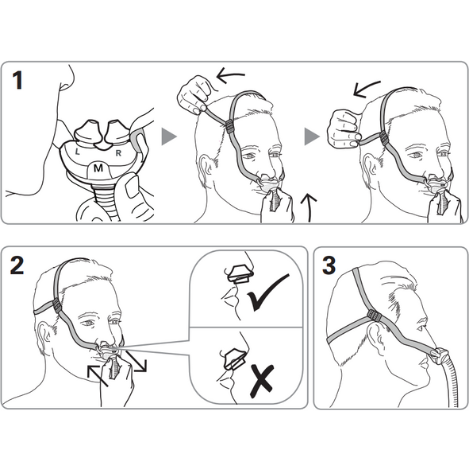
Fitting Your Mask:
Refer to the fitting diagrams in these instructions.
- While holding the cushion away from your nose, make sure that the cushion size, left (L) and right (R) indicators are facing towards you. Place the cushion under your nose.
- Pull the headgear bands over your head by holding the bottom band and stretching it around the back of your head. The top band should sit comfortably on the crown of your head.
- Briefly pull your mask away from your nose and place it back to ensure that the cushion fits comfortably.
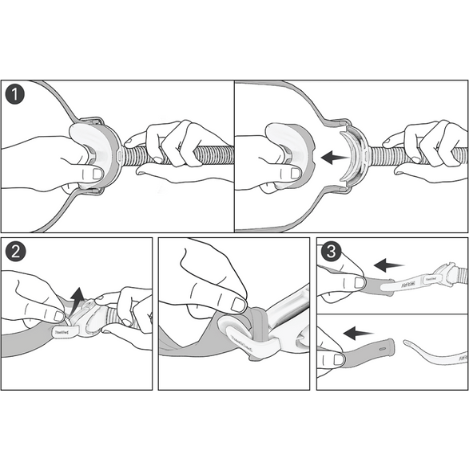
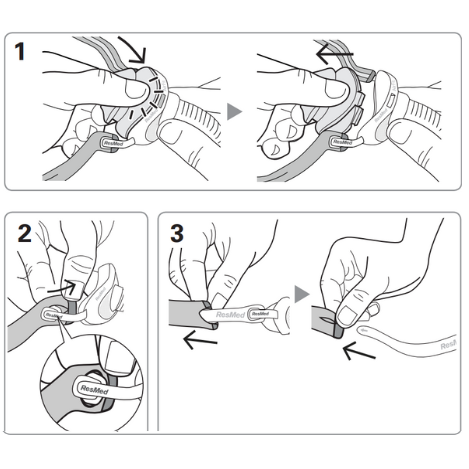
Disassembling Your Mask:
If the mask is connected to your device, disconnect the device air tubing
from the short tube.
- Firmly pinch one side of the cushion and pull away from the frame.
- Unhook the headgear from the stabilizer by pulling on the end cap to reveal the buttonhole.
- Slide the headgear off the end of the stabilizer.
| Operating Therapy Pressure Range |
| 4 - 25 cm H²O |
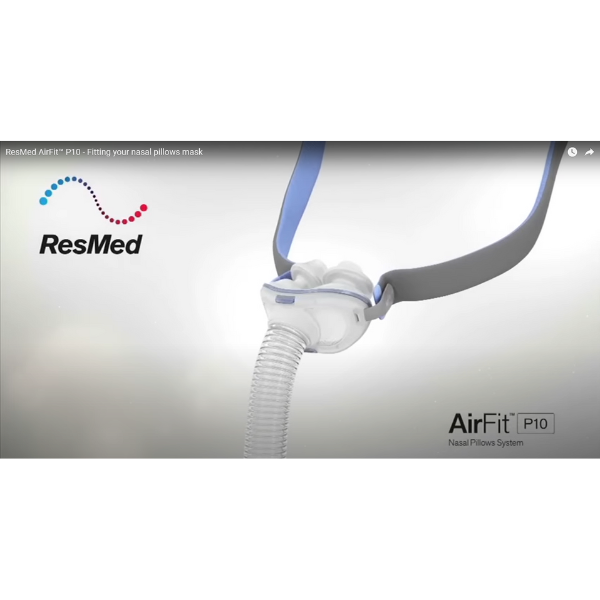
AirFit™ P10:
Assembling Your Mask:
Refer to the assembly diagrams in these instructions.
- With the grey side facing out, insert each end of the headgear band over the stabilisers through the buttonholes. Secure in place by wrapping each band end up and around the nodes. Holding the split bands, pull the headgear from the stabiliser to ensure it is tightly secure around the nodes. Ensure the headgear band is not twisted.
- Attach the pillows to the mask frame by inserting the top and bottom clips into the correct slots (shorter clip into top slot, longer clip into bottom slot) on the mask frame. Your mask is now reassembled.
- Ensure the inner walls of the nasal pillows are not compressed or collapsed. If they are, squeeze each nasal pillow so they return to the correct shape.
Fitting Your Mask:
Refer to the fitting diagrams in these instructions.
- Hold the pillows away from your nose ensuring that the pillow size (eg, M) with the left (L) and right (R) indicators are correctly facing towards you then guide the nasal pillows into your nostrils (L into your left nostril, R into your right nostril). Pull the headgear over your head by holding the bottom band and stretching it around the back of your head. The top band should sit comfortably on top of your head.
Tip: There are raised logos on top of the frame so you can feel the correct way up when fitting in the dark. - Move the mask away from your face then place it back to get a comfortable fit. Ensure the nasal pillows fit securely into your nostrils with both pillows positioned upright.
- Finally, connect the end of the mask tubing into your device air tubing. Your mask is now fitted and ready to use. When the device is running, a light breeze should be felt through the vent. To inspect the vent place a finger close but not over the entire vent area.
Disassembling Your Mask:
If the mask is connected to your device, disconnect the device air tubing
from the short tube.
- Holding the top of the mask tubing, squeeze and pull the pillows away from the mask frame.
- Unhook the headgear from the stabiliser by pulling on the end cap to reveal the buttonhole.
- Slide the headgear off the end of the stabiliser.
| Operating Therapy Pressure Range |
| 4 - 20 cm H²O |
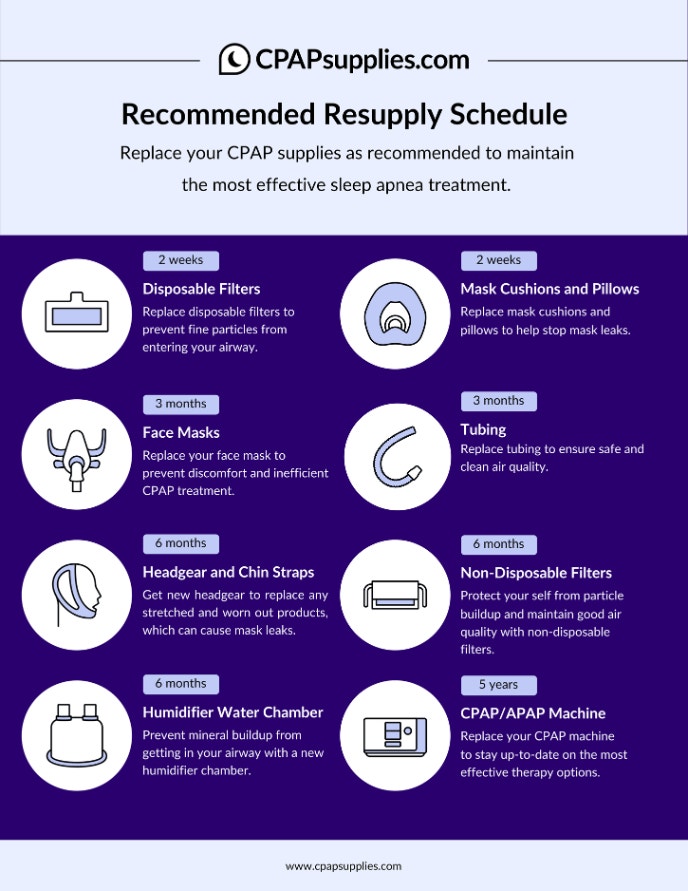
CPAPsupplies.com: CPAP Supplies Replacement Schedule

Resmed AirMini™: How to Use HumidX & HumidX Plus

AirFit™ N30: Fitting Guide
AirFit™ P10: Fitting Guide
- CPAP Mask Frame Replacement Frequency: Resupply Every 3 Months
- CPAP Mask Cushions/Pillows Replacement Frequency: Resupply Every 2 Weeks
- CPAP Mask Headgear Replacement Frequency: Resupply Every 6 Months
CPAPsupplies.com: CPAP Supplies Replacement Schedule

Cleaning Guide
Regularly cleaning your CPAP mask parts and components is crucial for avoiding the accumulation of bacteria, debris, oils, and other contaminants. This will help prevent the buildup of germs that may cause skin irritation and other unwanted side effects.
Before following the instructions below, first make sure your CPAP machine is unplugged from the power source, disconnect your mask and air tubing from your CPAP machine, and disassemble your mask components into 3 parts (nasal cushions/nasal pillows, headgear, and frame):
| Part | Cleaning Frequency | Instructions |
|
Nasal Cushions / |
Daily |
|
|
Mask Frame |
Weekly |
|
|
Headgear |
Weekly |
|
|
Chinstrap |
Weekly |
|
*Avoid using strong detergents or soaps, especially those that contain harsh chemicals, perfumes, dyes, moisturizers, or alcohol.
You can find more useful information regarding CPAP cleaning with this blog:
Compatible Masks (all masks listed are referencing the mask options specifically created for the AirMini™):
-
AirFit™ N30 nasal CPAP masks
-
AirFit™ P10 nasal CPAP masks
-
F20 full face CPAP masks
-
N20 nasal CPAP masks
Related Products:

| SKU | pb_airmini-starter-pack-with-mask |
|---|---|
| Model | pb_airmini-starter-pack-with-mask |
| UPC | 00619498388240, 00619498388257 |
| Prescription Required | Yes |
| Manufacturer's Warranty | 90-day limited manufacturer's warranty |
| FSA/HSA Eligible | Yes |
| Dimensions | P10 Mask: 5.9” (W) x 1.2” (D) x 23.2” (H); N30 mask: 5.9” (W) x 1.2” (D) x 23.2” (H); AirMini tube: 15 mm (inner diameter), 6'2" (L) |
| Included | 38824, 38878, 38809, 38812 |
1 Item Added to Cart