


Philips Respironics DreamWear Silicone Nasal Pillow CPAP Mask Fit Pack (Small/Medium)


The Philips Respironics DreamWear Silicone Nasal Pillow mask is designed with innovative features like the silicone frame and nasal pillows that provide superior comfort, freedom of movement and a secure seal during sleep therapy.


Philips Respironics DreamWear Silicone Nasal Pillow CPAP Mask Fit Pack (Small/Medium) Overview
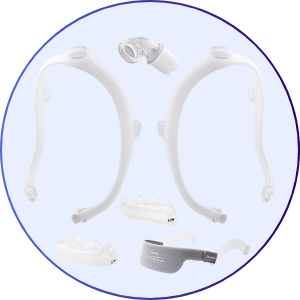
The DreamWear Nasal Pillow CPAP Mask features Philips Respironics innovative design that directs airflow through a silicone frame to provide comfortably and more freedom of movement during sleep therapy. This Fit Pack for the Philips Respironics DreamWear Silicone Nasal Pillow CPAP Mask includes 1 Small and 1 Medium Mask Frame, as well as 1 Small and 1 Medium Nasal Pillow. The adjustable DreamWear headgear with arms is also included.
-
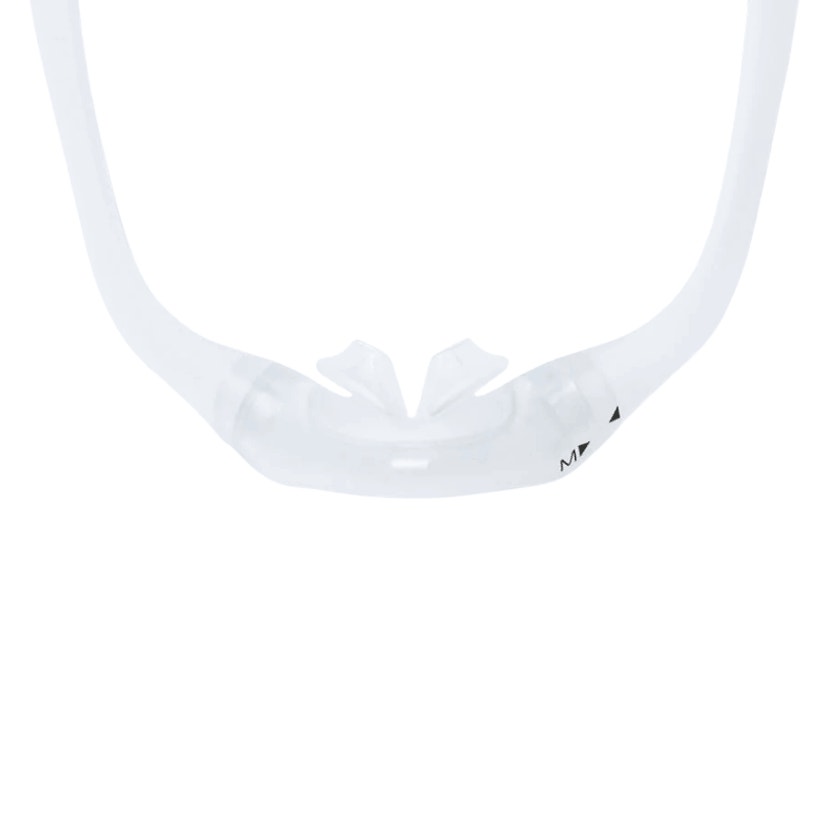
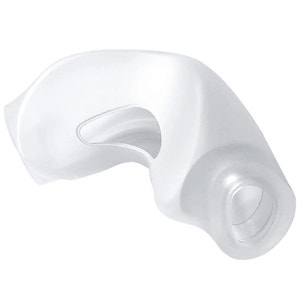
Silicone Nasal Pillows - Lightweight and soft, the silicone nasal pillows contour to your nostrils to create a comfortable, secure seal.
-
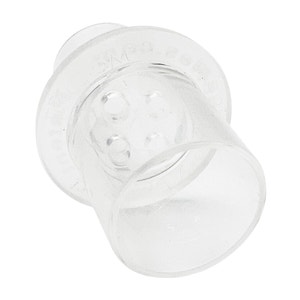
Soft, Silicone Mask Frame - Innovative design of the silicone mask frame that adapts naturally to facial contours while allowing for relief at pressure points.
-
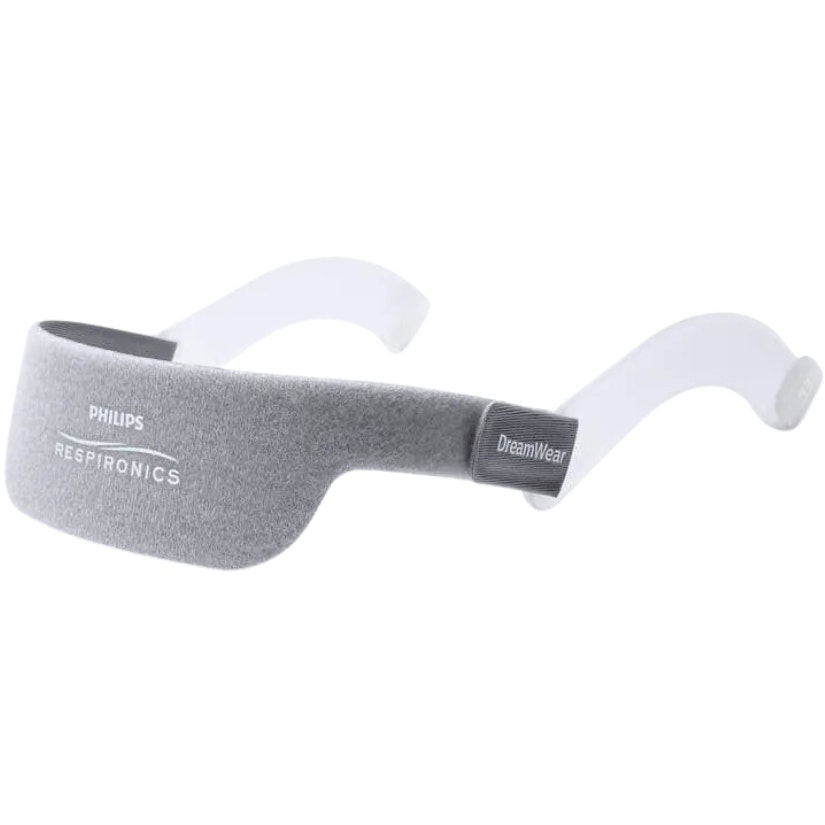
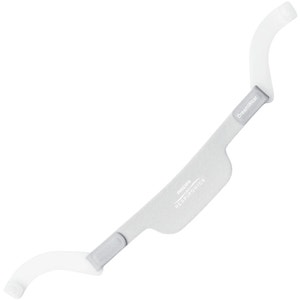
Adjustable Headgear - The DreamWear Nasal Mask headgear features arms that stabilize the mask.
-
2 — DreamWear Mask Frames (1 - Small, 1 - Medium)
-
2 — DreamWear Silicone Nasal Pillows (1 - Small, 1 - Medium)
-
1 — Adjustable DreamWear Headgear with Arms
If you're looking to purchase the Philips Respironics DreamWear Silicone Nasal Pillow CPAP Mask components without a prescription, you can find them here.
Breathing Style:
-
Nasal Breathers
- Mouth Breathers (when paired with a CPAP mask chinstrap)
Sleeping Style:
-
Back Sleepers
-
Side Sleepers
-
Active Sleepers
-
Stomach Sleepers
Additional Considerations:
-
Low to Mid Pressure Settings
-
Minimal Contact
-
Glasses Wearers
-
Claustrophobia
-
Facial Hair
-
Full Field of Vision for Readers or TV Watchers
- Tossing and Turning During Sleep
Fitting Your Mask:
Remove all packaging before using the mask.
Refer to the fitting images of these instructions.
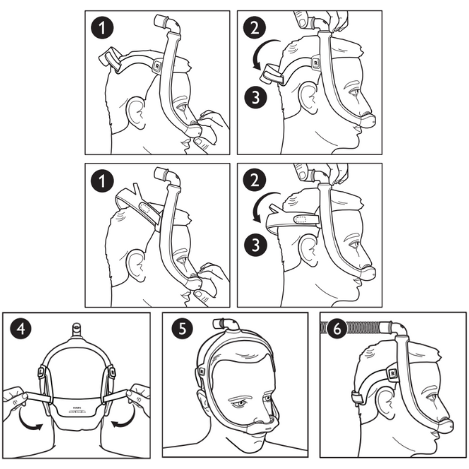
Putting on the Mask
- As shown in the figure below, with the mask assembled (see Assembly section), place the cushion under your nose and insert the pillows cushion tips into your nostrils.
- Position the frame on the top of your head.
Tip: For proper sizing, see Cushion Sizing and Mask Frame Sizing sections. - Pull the headgear over the back of your head.
Adjusting the Mask
- Peel the headgear tabs away from the fabric. Adjust the length of the straps.
Press the tabs back against the fabric to reattach.
Note: Do not overtighten the headgear. Signs of overtightening include redness, sores, or bulging skin around the edges of the mask. - Position the mask until it fits comfortably.
- When the mask is worn correctly, the elbow should rest on the top of your head.
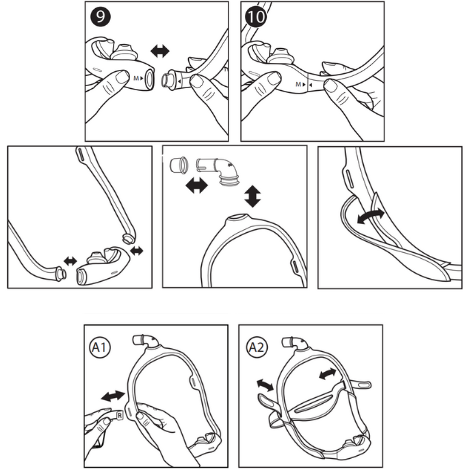
Assembling and Disassembling Your Mask:
Refer to the assembly and disassembly diagrams in these instructions.
Assembly
- Align the triangles on the cushion and mask frame. Press the cushion into the frame until it clicks into place.
Note: The end of the cushion and the opening in the mask frame are “D” shaped. The cushion end should match the frame. - Insert the elbow into the top of the mask frame.
- Push the tubing quick release onto the elbow until it clicks into place.
- Wrap the fabric sleeves around the mask frame and press the strips together.
Note: The sleeve seams should be on the outside of the frame. - Headgear assembly:
• Headgear with arms A1:
a. Push the end of the right headgear arm (marked with an “R”) through the right mask frame loop. Repeat on the left side with the left (“L) headgear arm and left frame loop.
b. Slide the fabric tabs into the slots on the arms and fold backwards.
Note: Once the mask is on, the letters should face outward with the “L” on the left side of your head and the “R” on the right side.
• Headgear A2: Slide the tabs into the slots on the mask frame and fold backwards.
Note: The Philips Respironics logo will be on the outside and facing up when correctly assembled.
Disassembly
- Headgear disassembly:
• Headgear with arms A1 : Gently pull each headgear arm out of the mask frame loop.
• Headgear A2 : Undo the headgear tabs and pull through the slots in the mask frame. - Undo the strips on the fabric sleeves and remove from the mask frame.
- Pull the tubing quick release from the elbow.
- Pull the elbow from the top of the frame.
- Pull the cushion from the mask frame.
| Operating Therapy Pressure Range |
| 4 to 30 cmH²O |
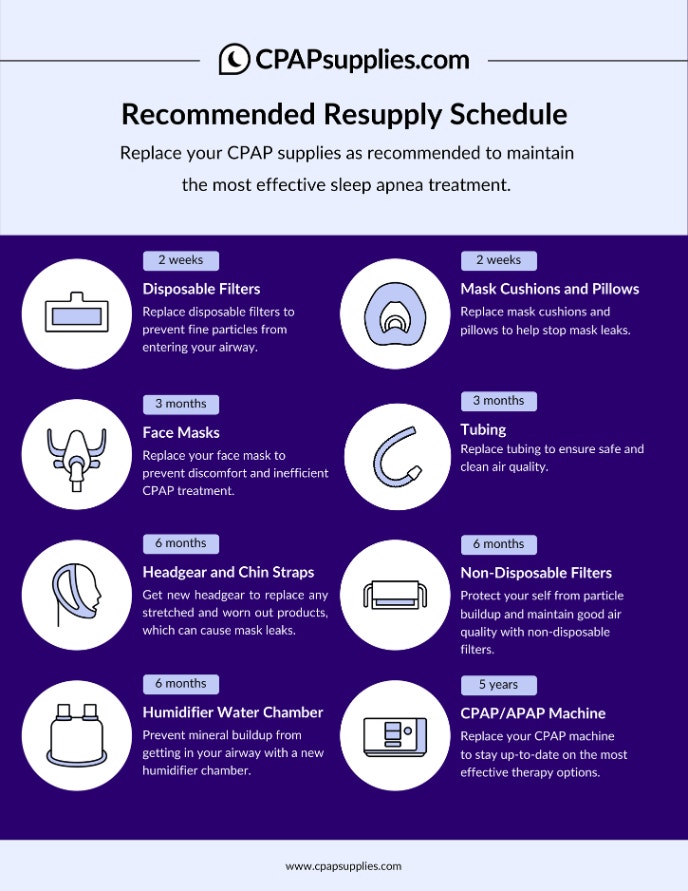
CPAPsupplies.com: CPAP Supplies Replacement Schedule
DreamWear Silicone Pillows Mask: Wearing and Adjusting Guide

DreamWear Silicone Pillows Mask: Sizing and Assembly Guide
DreamWear Silicone Pillows Mask: Disassembling and Cleaning Guide
- CPAP Mask Frame Replacement Frequency: Resupply Every 3 Months
- CPAP Mask Cushions/Pillows Replacement Frequency: Resupply Every 2 Weeks
- CPAP Mask Headgear Replacement Frequency: Resupply Every 6 Months
CPAPsupplies.com: CPAP Supplies Replacement Schedule

Cleaning Guide
Regularly cleaning your CPAP mask parts and components is crucial for avoiding the accumulation of bacteria, debris, oils, and other contaminants. This will help prevent the buildup of germs that may cause skin irritation and other unwanted side effects.
Before following the instructions below, first make sure your CPAP machine is unplugged from the power source, disconnect your mask and air tubing from your CPAP machine, and disassemble your mask components into 3 parts (nasal pillows, headgear, and frame):
| Part | Cleaning Frequency | Instructions |
|
Nasal Pillows |
Daily |
|
|
Mask Frame |
Weekly |
|
|
Headgear |
Weekly |
|
|
Chinstrap |
Weekly |
|
*Avoid using strong detergents or soaps, especially those that contain harsh chemicals, perfumes, dyes, moisturizers, or alcohol.
You can find more useful information regarding CPAP cleaning with this blog:


| Brand | Philips Respironics |
|---|---|
| Weight | 0.25 lbs |
| SKU | 22833 |
| Model | 1146470 |
| HCPCS | A7034 |
| UPC | 606959060968 |
| Prescription Required | Yes |
| Manufacturer's Warranty | 90-day limited manufacturer's warranty |
| Color | Clear & Gray |
| FSA/HSA Eligible | Yes |
1 Item Added to Cart
